This post is old. Please see instead 2015/06/docx4j-from-github-in-eclipse-5-years-on/
docx4j is now on GitHub! https://github.com/plutext/docx4j
This should make it easier for users to maintain their own branches (public or private), and contribute improvements back.
As of now, GitHub is the project’s authoritative version control. We’re no longer updating the existing svn repository.
Its pretty easy to work with docx4j sources in Eclipse. This post shows you how.
First, make sure you have eGit installed in Eclipse. Install it from here. On Windows, it is also useful to have msysgit. Refer elsewhere for how to set these up. Update: there is a GitHub Windows client now (I haven’t tried it) which apparently includes msysgit.
You also need m2eclipse
Assuming you’ve done all that, setting up the docx4j source code is just a few steps.
But first, be aware there is a difference between cloning and forking. Cloning gives you a copy of the source code you can work on, but without more, no easy way to contribute changes back. Forking sets you up with the source code, and makes it easy to contribute changes back.
If you think you might be making changes to the docx4j source code, you’re probably best to create a fork on GitHub right from the start.
Step 1 (optional, but recommended): To create a fork, log in to GitHub, visit https://github.com/plutext/docx4j then press the “Fork” button.
Step 2: Create your local repository (git clone)
This can be done from within Eclipse, or using Git Gui (easiest), or Git Bash Shell.
To do it from within Eclipse, File > Import .. > Repositories from GitHub:
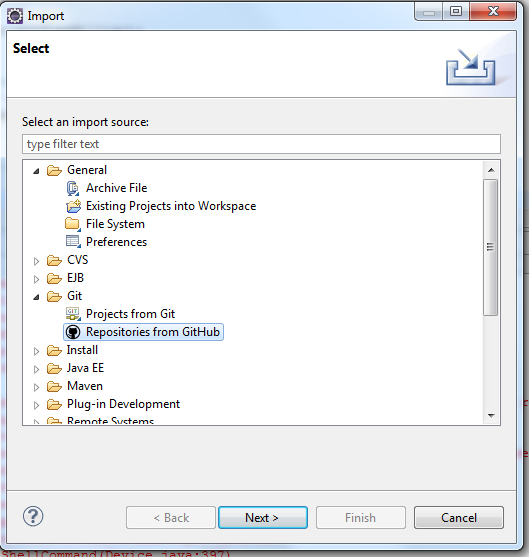
If you forked docx4j, find your fork (it might not appear immediately, which is why Git Gui or Git Bash Shell are better for this step), select it, and click next.
If you didn’t fork docx4j, type ‘docx4j’ then press ‘search’, the plutext/docxj repository should come up:
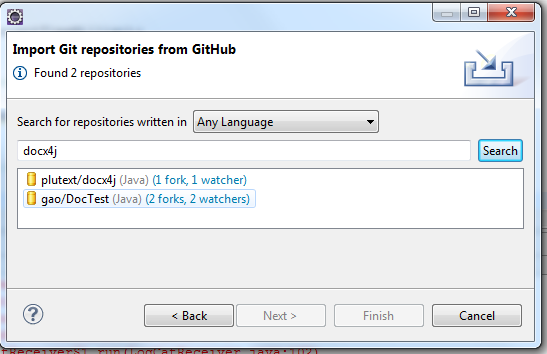
Select plutext/docx4j, then click next.
This creates a local git repository on your computer.
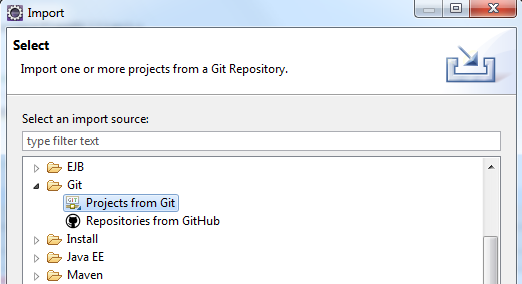
Step 3: Now you need to import that repository into Eclipse as a project:
File > Import .. > Projects from Git
Eclipse should find the existing project settings:
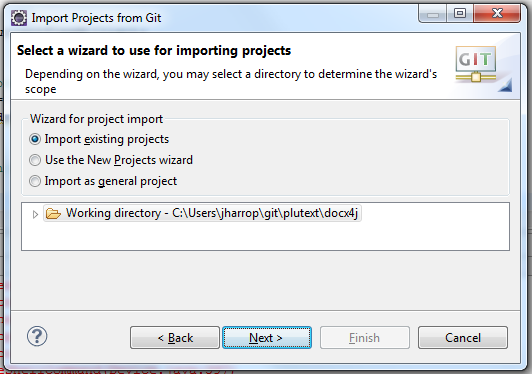
(If it didn’t and you had to use the new projects wizard; be sure to set the file location to wherever your git repository is, rather than letting Eclipse create a new empty project in the workspace)
Now you should have a docx4j project in Eclipse, and it should be properly configured (since the project settings come with the project).
You should be done. But if something isn’t right, you can configure it manually (see further below).
Next steps? Improve the docx4j source code in Eclipse :-), then Team > Commit, to commit those changes to your local repository.
Made a change which would be useful to others? If you forked docx4j as per step 1 above, you can push your changes to your repository on GitHub, then send a pull request.
If you didn’t fork docx4j, do that now on GitHub, then configure things locally to push your changes to your repository on GitHub, then you’ll be right to push your changes to your repository on GitHub, then send a pull request. Other docx4j users will thank you for this 
Manual configuration:
Configure > Convert to Maven Project
Properties > Java Compiler > Compiler compliance level: change to 1.6
Java Build Path > Libraries: remove 1.5 system library; Add Library … JRE System Library .. 1.6
Java Build Path > Source: check none of the entries say “Excluded: **” (remove the exclusion)

 ), you can post in our


